

How I Found My Art Style
Letting go of “the right way” and learning to trust what came naturally.
If you’ve ever felt like being an artist just wasn’t an option, maybe because your brain didn’t work the right way, I want to talk to you for a minute.
I grew up around lots of people who called themselves artists. People who could practically breathe their imaginations into existence. Members of my own family — they just had it. Give them a blank page and something beautiful would appear. No reference, no hesitation. Just pure creativity, flowing straight from mind to hand.
That wasn’t how I worked. Still isn’t.
For a long time, I thought that meant I wasn’t an artist. I wasn’t able to sit down and draw from nothing. I needed prompts. References. Structure.
Deep down, I felt like that disqualified me.
But it doesn’t.
It took me years (and a lot of “failing”) to realize there’s more than one way to be creative. More than one way to make something meaningful. Needing a starting point doesn’t make you less of an artist! Time spent trying, borrowing, experimenting — it isn’t wasted. That’s how you learn.
That’s what this post is about.
I want to show you something I made. But more than that, I want to share how I got there, not because I think you should follow it step by step, but because it might spark something you can try your way.
I don’t believe in handing out precise shopping lists or rigid instructions. I believe in inspiration that invites improvisation. You can start where I did and end up somewhere entirely your own, and that, to me, is art.
I’ll walk you through how this piece came together, from a digital sketch to paint on canvas. Not as a tutorial, but as an invitation:
What could this look like in your hands?
I got started on my iPad using Procreate — my preferred way to sketch quickly and try new things. I’d seen a photo on Pinterest (my all time favorite app) and it sparked an idea. So I pulled it up as a reference and started sketching florals with bold blacked out backgrounds. Procreate makes it easy to experiment while keeping the original image nearby as a guide.
This piece isn’t going to be put up for sale. It’s just for me, something cheerful to keep me company. And honestly, I think that’s one of the best parts of exploring art: it can be just for you. That’s what makes it feel safe. You don’t have to share it, sell it, or explain it. These early pieces are your stepping stones — ways to grow your skill, follow your curiosity and fill your space with something your own hands made.
Side note: This is the music that plays in my head when I’m breaking things down and getting started on a new project.
Months ago, I found these frames at a craft store, art included. But the pieces inside just weren’t for me. The colors, the style… they didn’t fit me. Still, the price was incredible and that meant only one thing: they were about to become mine.
And mine they were… even as they sat gathering dust in the back of my studio until this piece finally called them forward.
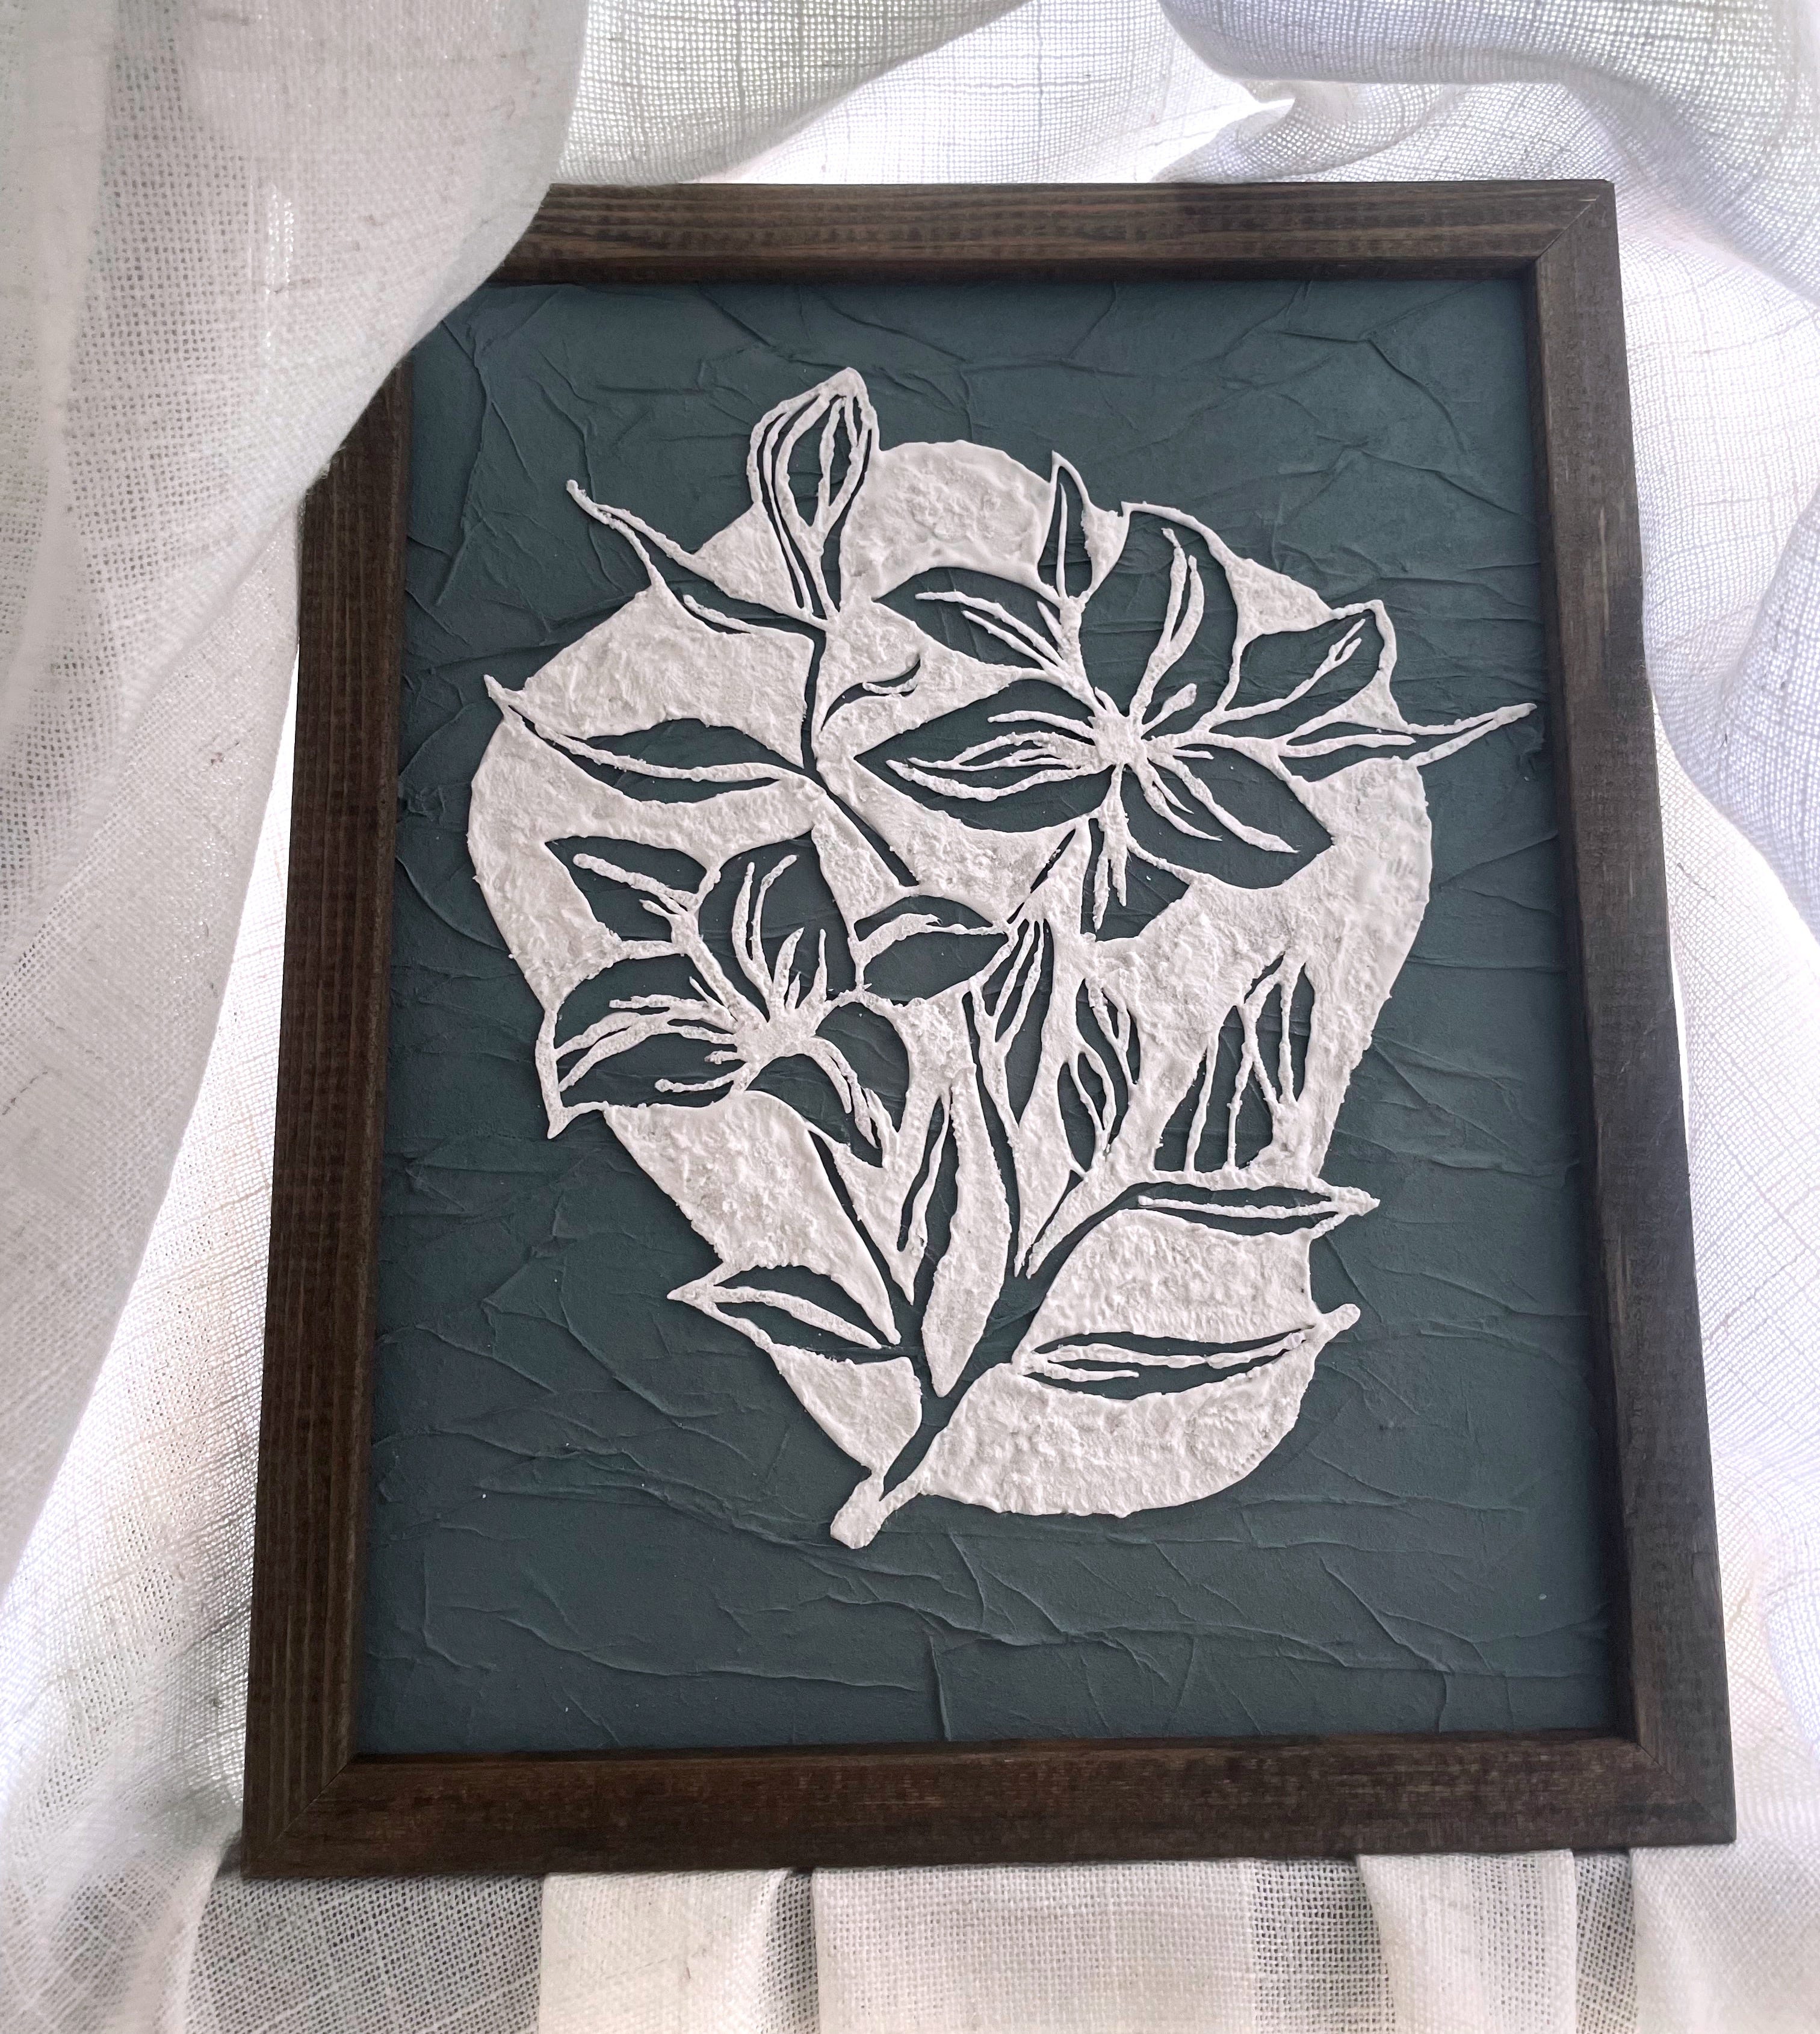
I pulled them out, took everything apart, cleaned them up, measured the insert and got to work. I brought those floral designs to my Cricut, cut them out and started weeding away the areas I didn’t want.
Onto the painting part. I covered the surface with a paint I mixed myself, to get the shade and consistency I wanted. I saturated the original background, then came back later for one more coat to make sure none of the old colors showed through. Looking back, I probably should’ve sanded the whole piece first to help the paint sink in better… but that’s the point of doing new projects like this. We learn. We grow.
Once the base had set a bit, I brushed on another layer, this time using it as glue, crinkling the tissue paper onto the surface, pressing and shifting it until the texture felt right. I covered that with my paint mix too. At this point, there was no chance the old art would peek through. Mission accomplished.
After that layer was dry, I mixed Mod Podge into my paint and brushed on a fresh coat before placing the stencil I’d cut with my Cricut. I pressed it in firmly, then brushed it with water to help it make full contact and soften into the texture underneath. This layer wasn’t pretty, but it didn’t need to be. It was just the map for what would come next.
Final Steps.
One last mix of paint, this time thickened with baking soda and sifted with my favorite trick: a tea infuser to smooth any lumps. I brought it to a thick spackle consistency. I wasn’t going for smooth, I wanted something with weight and texture.
This is the part where I exhale a little. I follow the stencil, guiding the paint where I want it to go, letting it dry in peaks and ridges. Then I muss it up with a dry brush until the surface feels interesting.
Line by line, it starts to feel familiar.
Projects like this encourage me to try more next time. They remind me to be brave. And when my brush slips or the lines get too thick? So what. It’s my flower. It can grow however it wants to.
What will you try?
Want to Try It Yourself?
If you’d like to explore your own style using the same shapes I started with, I’ve put together two ways to begin:
Ready to Print Pages
With the original starting shapes — just download, print it out and start experimenting with color, texture or layering however you like. There’s no right answer here. Just space to play.
PNG Cut Files on Gumroad
For if you’d like to take the original elements into Cricut, Procreate or any digital design program. I’ve made the cut ready (transparent) PNGs available on Gumroad. Just plug them into your design space, size to your liking and enjoy the process of making them your own.
Download from Gumroad.